Table Of Content

The problem I encountered had to do with the construction of the piece. The roof was too long and covered up the sides..at 9 inches..that is long, so trim them shorter. The royal icing was missing something and it was not the consistency that it needed to be to constuct the house. I would recommend another royal icing recipe than this one. I am a chef and, in my professional view, the template and the royal icing recipe need to be tweaked. I have enjoyed making gingerbread houses almost every year since!
Cookies and Gingerbread Houses to celebrate any occasion!
Making Gingerbread Houses is really fun and a great activity to put you in the holiday spirit. They make a fun Christmas decoration that you can enjoy too! Substitute the butter with a vegan butter (suitable for baking).
Spectacular Cakes
Both are added for flavor for the gingerbread cookie. Due to the strong flavors in gingerbread dough, vanilla isn’t necessary. This is such a key ingredient for a classic gingerbread dough!
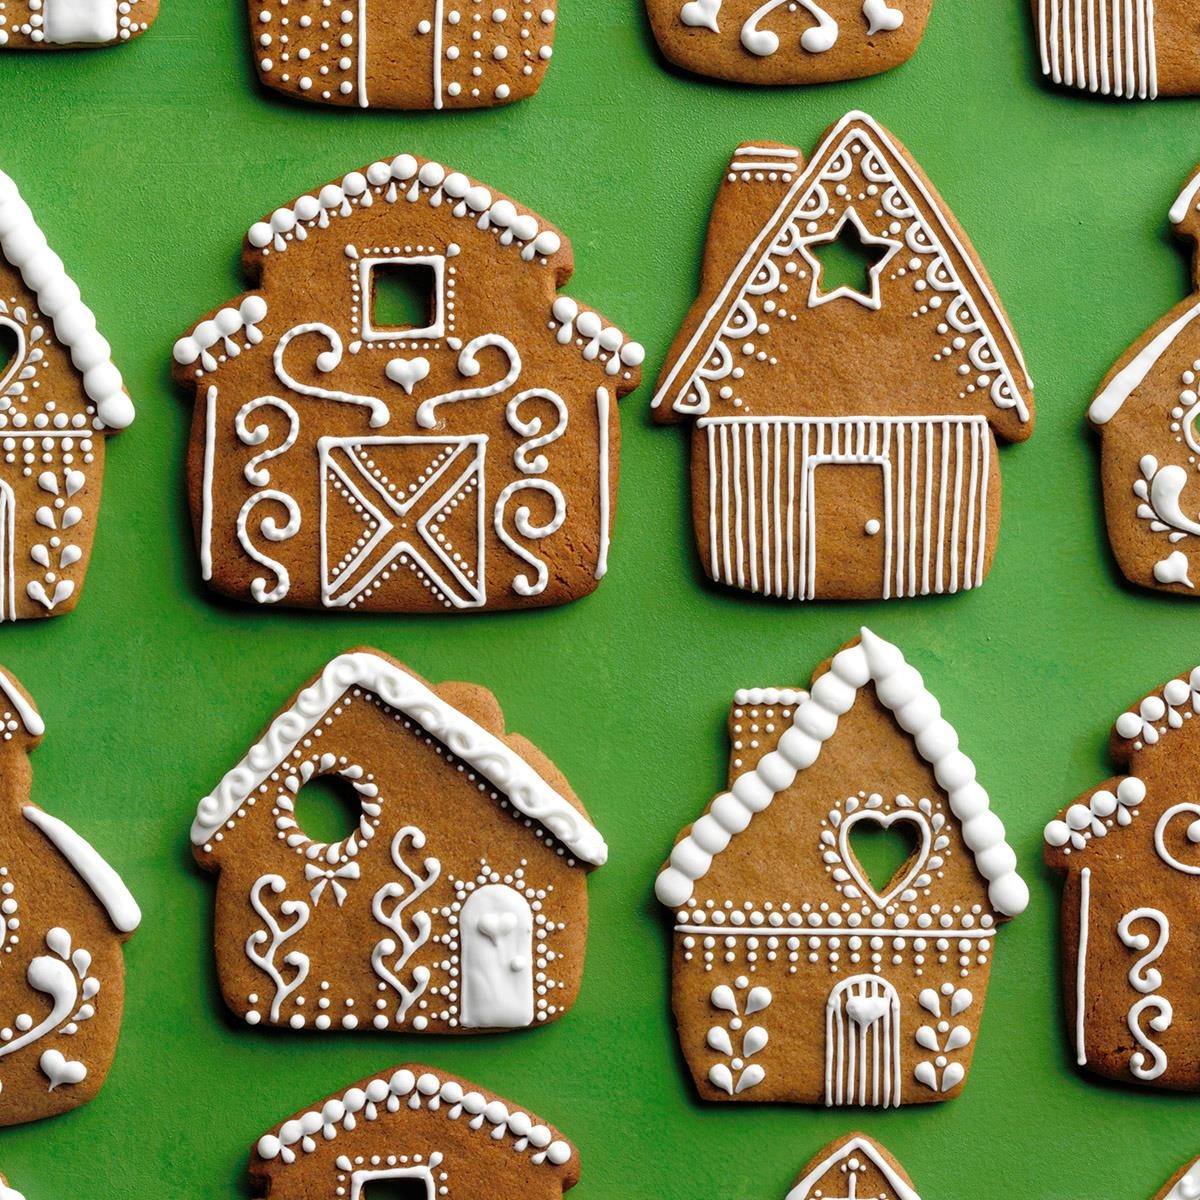
Easy gingerbread house decorations
Making a gingerbread house is no simple task (unless, of course, you get one of those pre-fab houses, in which case these notes will be of little help). My Canadian Cookbook with same recipe does not call for drying the gingerbread slabs out at all. I found once baked, they were hard enough, that if you wanted to use them once cooled, you probably could. Agree with others - cut the gingerbread after it comes out of the oven, while it is still soft. I waited the 5 days the instructions suggest and my cuts were not clean, plus I had a corner crumble because the gingerbread was too hard by that point.
GINGERBREAD HOUSE DAY - December 12 - National Day Calendar
GINGERBREAD HOUSE DAY - December 12.
Posted: Wed, 27 Sep 2023 14:01:28 GMT [source]
The gingerbread should just start to darken at the edges, and then you know it’s done. OR, you have the option of removing the scrap dough, and baking just the shapes you need (Image 27). Any remaining space can be used to cut out the chimney parts, and other gingerbread shapes you like. Use dough thickness guide to make it easier to roll out the dough to an even thickness. Place the dough in a ziploc bag, and spread the dough evenly inside while removing excess air. You can also wrap the dough in plastic wrap.
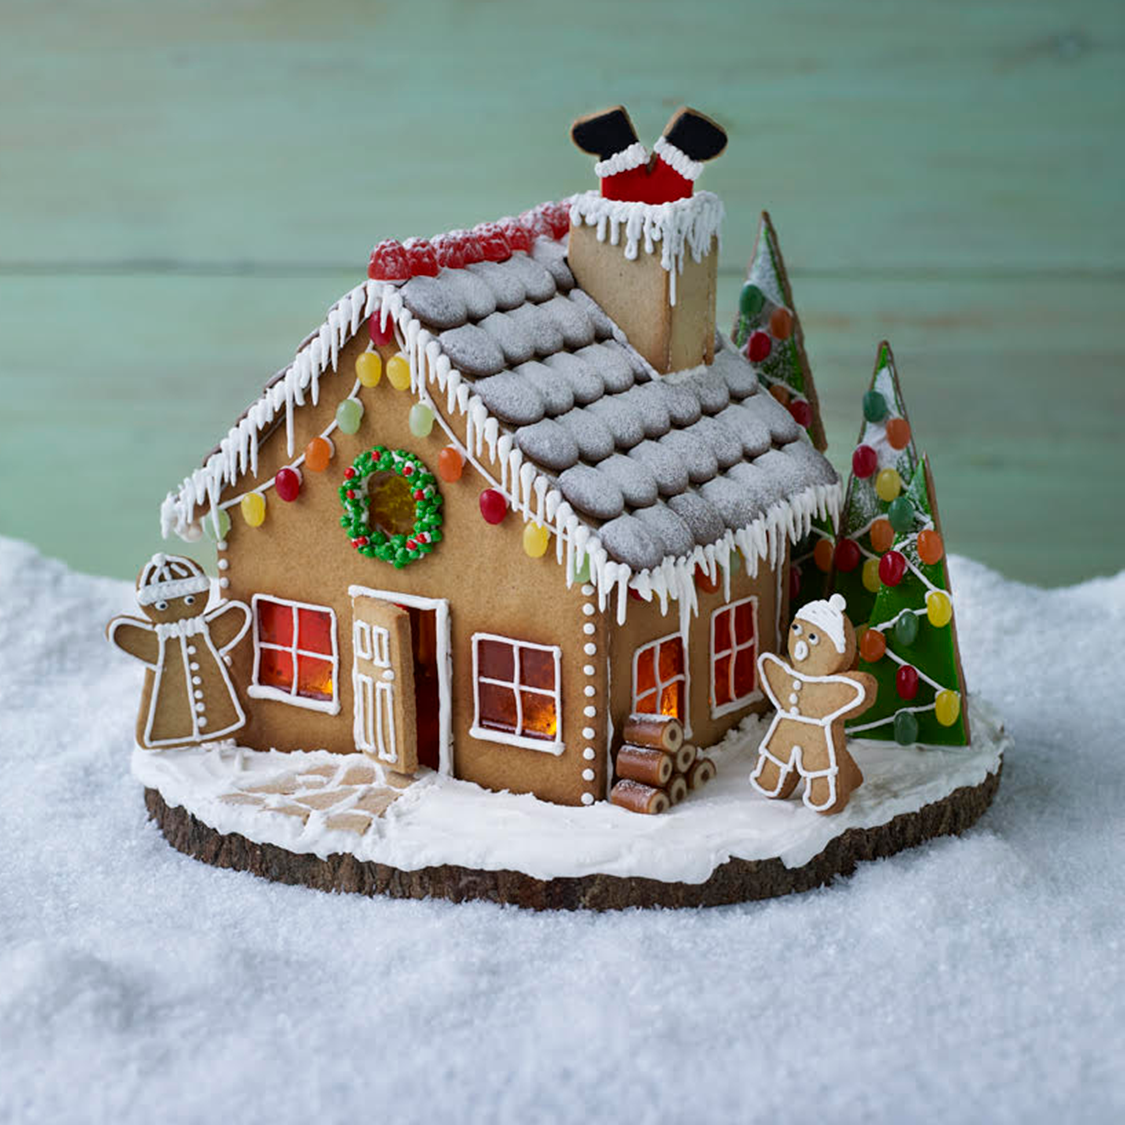
In addition, if you want to keep your house for as long as possible, you’ll want a frosting that’s devoid of any butter, as this can cause it to rot faster. Once the house is baked and cooled and you have your icing made, it’s time to build the gingerbread house. If you plan to build a house just for display, appearance and aroma are more important than flavor, so choose a stiffer dough like this Construction Gingerbread. It has the flavor and aroma of a cookie meant for munching, but with a texture that’s a bit firmer and tougher than other recipes. This is ideal if you’re building a complicated design or if you want to display your gingerbread house for a long time.
It’s a must when creating a gingerbread house recipe! Our recipe uses egg whites and icing sugar. Roll out the dough on a sheet of lightly floured parchment paper (so you can easily transfer it to a baking sheet later). Keep it at least 1/4" thick for strong walls. Lightly flour the surface of the dough and place your cutters or pattern pieces about 1" apart. Cut out all the shapes, then remove the excess dough between your pieces. By removing the excess rather than moving your cut pieces, you will avoid distorting the shapes, which can affect how well they’ll fit together.
I like to keep it as a square so that it’ll be easier to roll out later (Image 15). Form each dough portion into a smooth disc, while dusting it with flour to prevent it from sticking (Image 14). Next, add the sugar, and cream the butter and sugar together until the mixture is creamy (Images 4 and 5). Make sure to scrape the sides of the bowl so that the butter and sugar mix well.
Bake the gingerbread (maximum of 2 trays at a time), for about 15 – 20 minutes (cut out pieces) or 20 – 25 minutes (without removing scrap dough). Once the dough is chilled, it’ll be easier to roll out. Remove the dough from the package and place it on your work surface (Image 22). I like to roll the dough out between two pieces of parchment paper, so I don’t have to use too much flour, but you can roll out the dough on a floured surface as well. Keep your gingerbread house in a tightly closed container as long as it’s out on your counter or in your pantry.
If you're feeling overwhelmed, break the process down into steps. Get recipes, tips and NYT special offers delivered straight to your inbox. Just got the first batch out of the oven and the gingerbread itself is delicious.
I’ve had success with decorating mine right away, but do what works best for you. Today’s comprehensive post will teach you everything you need to know about how to make a gingerbread house from scratch. First, you’ll get a construction quality gingerbread cookie house recipe that’s high altitude tested, and works at low altitudes, too. The gingerbread recipe is strong and sturdy, ideal for making your own DIY gingerbread house for Christmas. Next, you’ll see how I designed the templates for my own house, so you can make your own template.
All you need is some hard candies but the trick to windows that stay nice and clear is to use sugar free candy. Sugar free candy is made with something called isomalt and is actually more resistant to clouding than traditional sugar. Step 3 - Peel away the excess dough and set it aside to roll out for the other houses.
Don't put them too close together or they will touch when they bake. This gingerbread house turns out so darling and are fun to create. They are made with a sturdy dough that is great for construction and tastes amazing too. Plus, I have even included TWO free printable pattern that is easy to follow.